
The decision is not “seal or replace”
Duct sealing before HVAC replacement is an order-of-operations question. The goal is not to make every homeowner postpone failed equipment. It is to avoid selecting new capacity from an old system whose leakage, restrictions and room delivery have not been measured.
ENERGY STAR's current quality-installation guidance treats equipment sizing, system airflow and duct evaluation as connected checks. It tells homeowners to ask for sizing based on the home's actual characteristics, airflow that meets the equipment manufacturer's performance specifications, and duct inspection plus leakage testing. A larger nameplate does not repair a disconnected branch, a crushed flexible run or a return path that cannot move the required air.
Use this checklist before the proposal locks in equipment capacity. If the existing unit cannot run safely, document that constraint and require the replacement scope to include the duct diagnostics and corrections that can still be performed.
1. Write down the symptoms before changing the system
Record which rooms run warm or cool, when the problem appears, whether doors change it, where noise occurs and whether filters load unusually fast. Note additions, enclosed porches, window changes, attic work or other changes since the present system was installed. This is not proof of a duct defect; it is a map for the inspection.
Keep the present equipment model information, thermostat settings and any service records available. Do not convert runtime, temperature or an electric bill into a promised equipment size or savings figure. Those observations help a qualified contractor decide what to measure.
2. Map the entire supply and return path
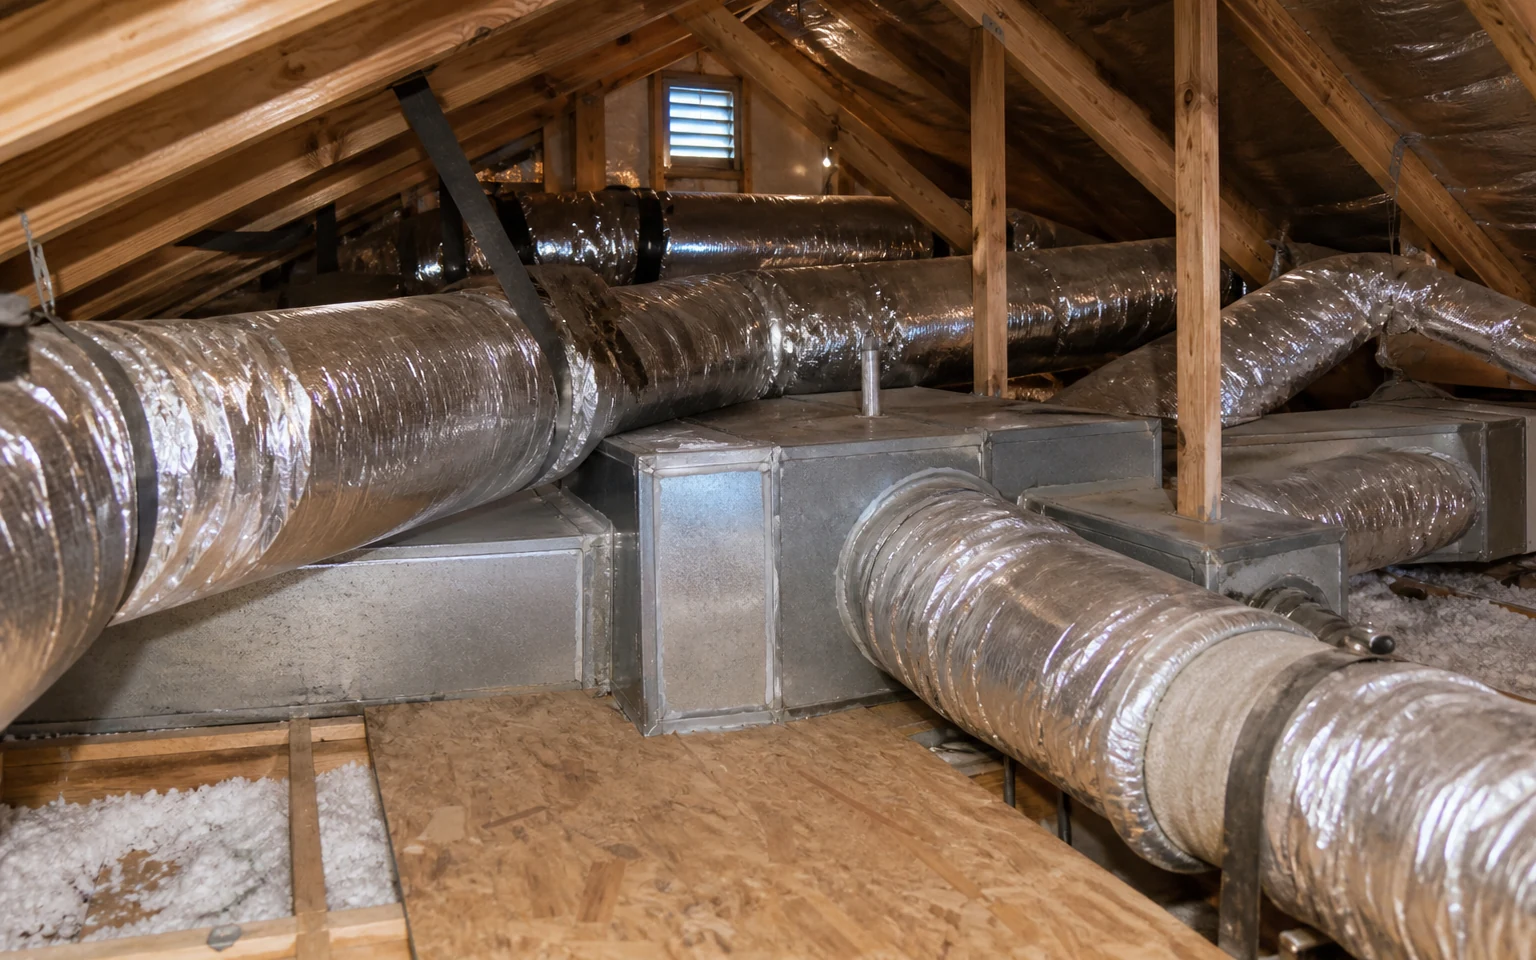
Ask for a visual inspection from the air handler through plenums, trunks, branches, boots, grilles and return paths. Include accessible attic, garage and crawlspace sections. Photograph disconnected joints, damaged insulation, crushed or sharply bent flexible duct, unsupported runs and visible cabinet or plenum gaps.
The ENERGY STAR duct-contractor checklist specifically calls for whole-system inspection, supply-and-return balance evaluation, repair of damaged or disconnected ducts and correction of tangled or crushed flexible ducts. A leakage number alone cannot show whether the system is badly routed or undersized.
3. Capture an operating baseline when it is safe to do so
With clean, correctly selected filters and the existing equipment operating in a normal mode, ask the contractor to record the blower setting and measured airflow or a documented airflow-verification method. Total external static pressure should be interpreted against the air handler or furnace manufacturer's data, not against a universal number.
This step separates two different problems: air escaping through openings and air failing to move because of resistance. Leakage can reduce delivered airflow, while restrictive filters, coils, returns, grilles, fittings or compressed duct can also limit it. ENERGY STAR says the finished system's airflow should meet manufacturer performance specifications; that requirement belongs in the replacement proposal, not just in a verbal assurance.
4. Measure duct leakage and name the test
Request a written result that identifies the test procedure, test pressure, system configuration and units. The DOE Building Science Education module, sourced to Pacific Northwest National Laboratory, distinguishes total duct leakage from leakage to outdoors and provides procedures for both. Those results answer different questions, so the report should not call either one simply “the duct test.”
Do not use a new-construction leakage threshold as a universal pass/fail rule for an existing home. The applicable target depends on the test, project, adopted requirements and scope. What matters for this sequence is a reproducible baseline, documented defects and a retest after repair.
5. Resolve safety and access before sealing
Do not cover damaged wiring, wet materials, suspect contamination or a failed structural support with sealant. Those conditions need the appropriate trade or investigation first. If the home has natural-draft gas- or oil-burning appliances, duct changes can affect pressure relationships. ENERGY STAR tells contractors to check for backdrafting and perform combustion-safety testing after sealing.
Decide which joints can be reached now and which require equipment removal or a larger duct reconstruction. Put inaccessible items and exclusions in writing so “duct sealing included” has a defined boundary.
6. Repair geometry and connections, then seal
Reconnect separated sections, support ducts correctly, straighten crushed or tangled flexible runs and repair failed boots or plenums before applying sealant. ENERGY STAR identifies mastic, metal tape and aerosol-based sealant as professional options and calls for registers and grilles to be sealed tightly to ducts. The product and method must match the duct material and installation instructions.
Do not treat insulation as the air seal. Seal the duct seams and connections first; then repair or add appropriate duct insulation where the scope calls for it. ENERGY STAR's duct-sealing fact sheet says not to use ordinary gray duct tape because it is not long-lasting; use a sealing system suited to the duct material.
7. Retest leakage and recheck airflow
Repeat the same leakage procedure so the before-and-after readings are comparable. Then recheck airflow and static pressure because a repair can change how the blower and duct system operate. The ENERGY STAR contractor guidance explicitly calls for airflow evaluation after duct repairs.
The useful deliverable is not a promise of comfort or savings. It is a record: test configuration, readings, repaired locations, unresolved defects, filter used, blower setting and the post-repair airflow or verification result.
8. Update the load calculation before selecting equipment
Only now should the design team freeze the assumptions used to size the replacement. ACCA Manual J is the ANSI-recognized residential load-calculation procedure and expressly includes duct insulation, duct leakage and duct load factors among its inputs. If those conditions changed, the load model should reflect the repaired condition rather than the old leakage.
A load calculation does not select a model by itself. ACCA Manual S uses the calculated loads, local design conditions and manufacturer performance data to select residential equipment. Ask for the calculation summary and the performance data used for the proposed indoor and outdoor combination.
9. Confirm that the ducts can serve the selected system
ACCA Manual D addresses duct-system physics, blower airflow, pressure drops, fittings, balancing and the interaction between the blower and the duct network. The selected equipment and its required airflow must be checked against the actual supply and return system. Sealing a system does not make an undersized return, excessive flex compression or poor room distribution disappear.
The proposal should identify any resizing, added return path, branch correction, balancing device or grille change required for the selected airflow. If the existing ducts cannot support the proposed system within manufacturer limits, resolve that scope before signing rather than expecting commissioning to discover it.
10. Put final commissioning in the contract
After installation, require the contractor to document the final filter, blower configuration, measured or verified airflow, static pressure, refrigerant-charge procedure where applicable, condensate operation, control settings and room-balancing work. Compare final readings with the design and manufacturer data, not with a generic target.
The clean sequence is: inspect, measure, repair, retest, calculate the load, select equipment, verify duct compatibility and commission. That sequence cannot guarantee a particular bill or comfort result. It does make the replacement decision traceable to the house and duct system that will actually remain in service.
For the broader replacement scope, see How to replace HVAC without repeating the old problem. For envelope changes that can alter the load, see Insulation, air sealing and indoor air quality work together.
Use this answer in a whole-property plan
Connect this topic to the planning hub, the primary decision page and the evidence standard that governs the next step.
- Planning hubWhole-home upgrade planning
- Primary decision pageEnergy advisory services
- Methodology and standardsHow BetterPowered uses illustrative scenarios
- Methodology and standardsBetterPowered Contractor Standard
Primary sources
Claims in this article were reviewed against these government and primary sources.
- 01 HVAC Quality InstallationENERGY STAR · August 11, 2026
- 02 Hire a Professional Contractor for Duct Improvement ProjectsENERGY STAR · August 11, 2026
- 03 Duct Sealing with ENERGY STARENERGY STAR · August 11, 2026
- 04 HVAC - Duct Leakage TestingU.S. Department of Energy Building Science Education · August 11, 2026
- 05 Manual J Residential Load CalculationAir Conditioning Contractors of America · August 11, 2026
- 06 Manual S Residential Equipment SelectionAir Conditioning Contractors of America · August 11, 2026
- 07 Manual D Residential Duct DesignAir Conditioning Contractors of America · August 11, 2026